

Professional shade installation can involve drilling mounting points, but installers aim to avoid unnecessary damage with careful placement. Understanding what to expect during a shade installation starts with the practical details: professional installation typically takes 1-3 hours per window, depending on the product and conditions. The finished look begins well before the brackets go up.
It’s natural to want a smooth process and a beautiful result without surprises to your walls or daily routine. This guide walks you through measuring window openings, preparing existing treatments and clearing the work area, then explains the installation sequence and how DIY compares with professional help. You’ll know what to do before installation day and what to look for as each shade is fitted and tested.
Key Takeaways
- Measure the opening at multiple points and use the narrowest width for an inside mount to help achieve a precise fit.
- Decide what happens to existing window coverings before installation day, and clear the area around each window.
- Expect mounting, alignment, and operation checks during installation; keep children and pets away from the work area.
- Compare the skill and tools a DIY project requires with the convenience of professional fitting, especially for large or awkward treatments.
Measuring window width and height
Each window should be measured separately before choosing an inside or outside mount. Accurate dimensions help determine the hardware position and ensure the finished shade suits the opening.
-
Gather Window Measuring Tools
Use a steel measuring tape, pencil, and paper to record each window’s dimensions. Keep the tape straight and level across the opening, and write down each measurement immediately to avoid mixing up rooms or windows. Label every entry by room and window position, such as “living room, left window.” Clear notes keep measurements distinct when several openings look alike.
-
Measure the Window Opening
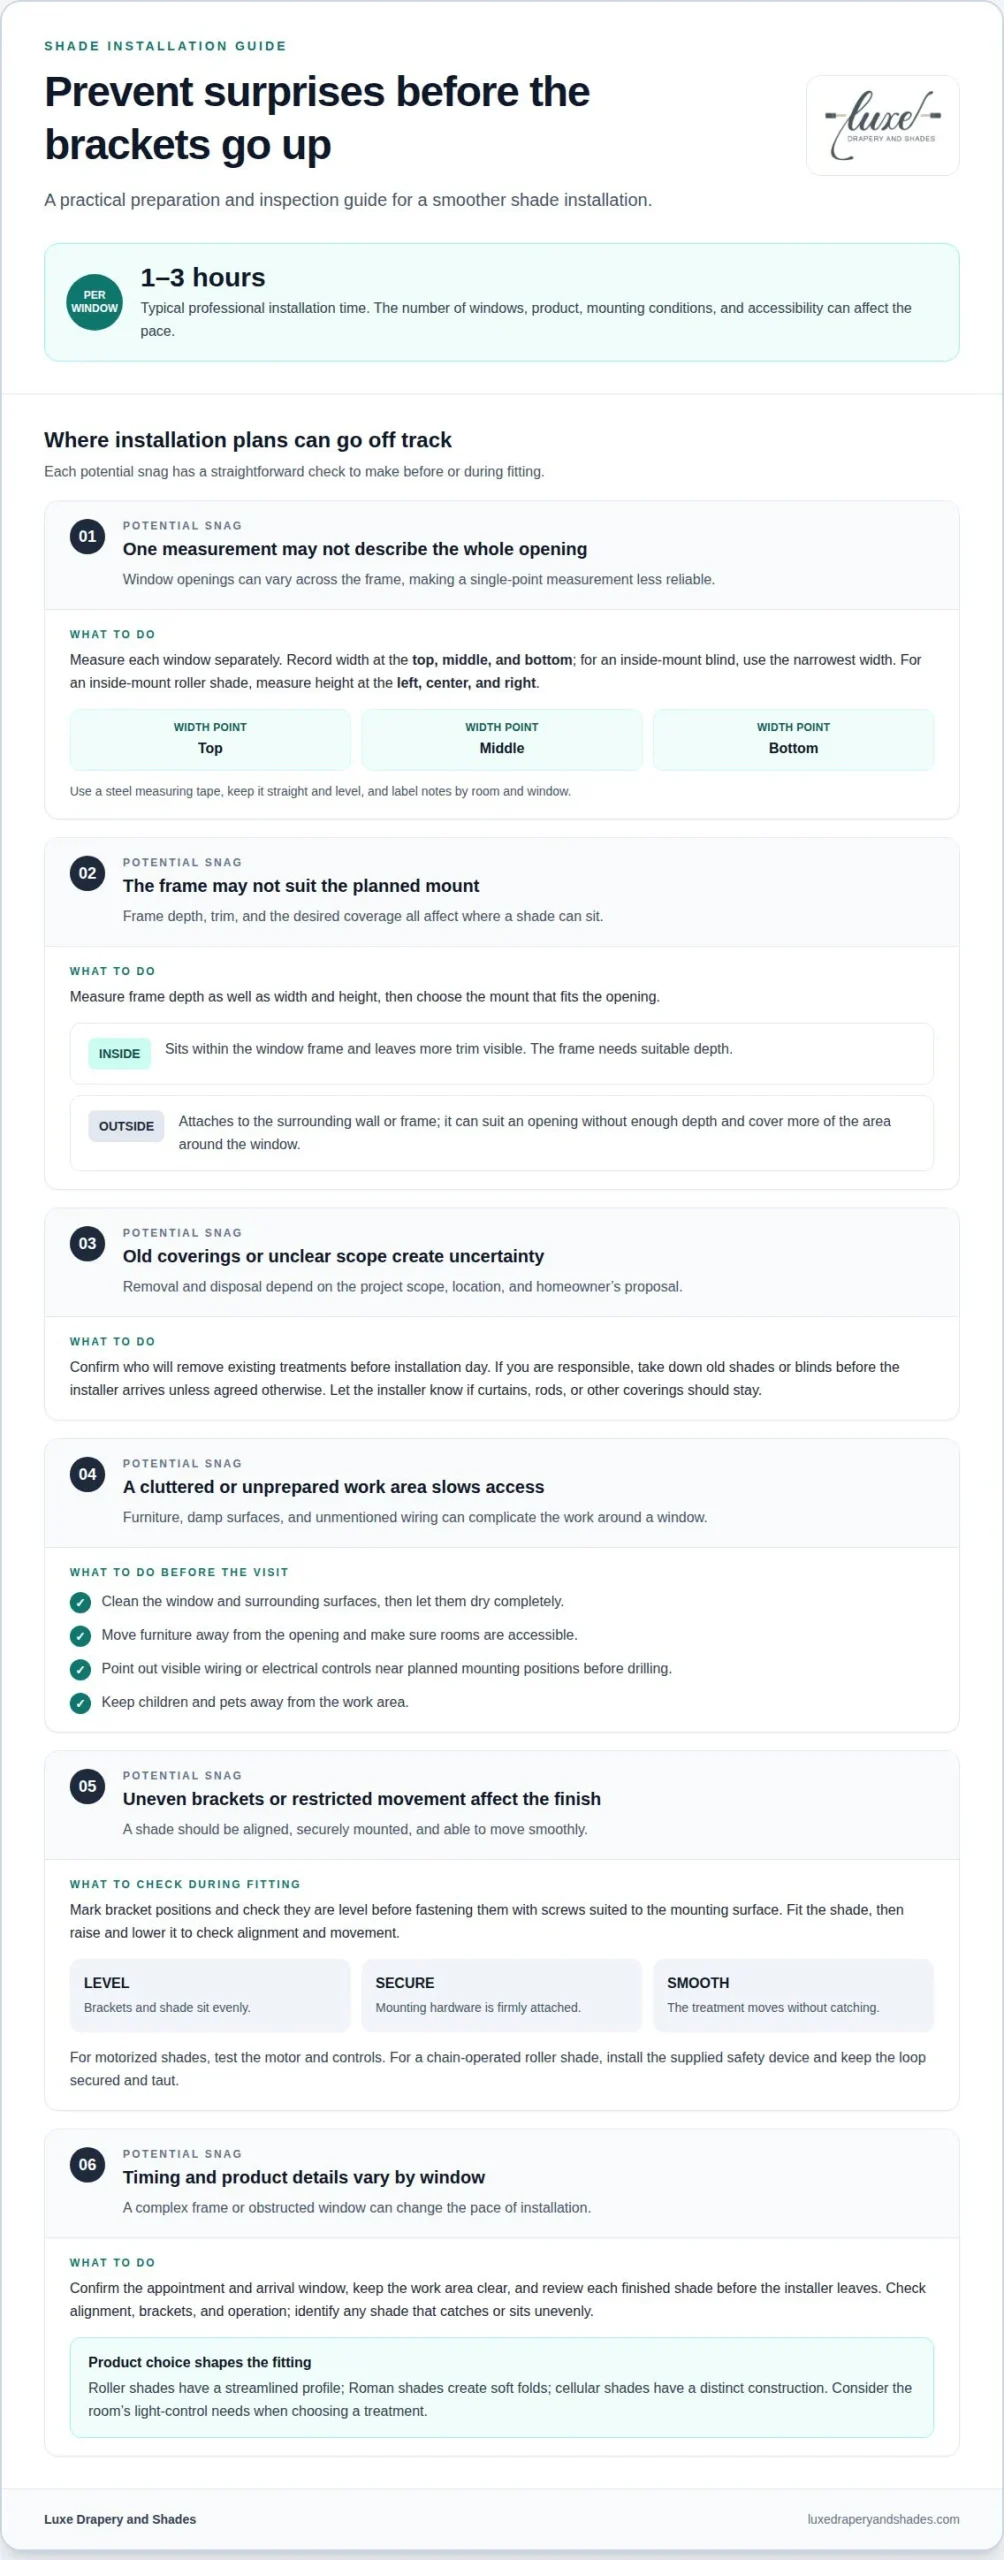
Measure the opening’s width at the top, middle, and bottom, then record each measurement. For an inside-mount blind, use the narrowest width. For an inside-mount roller shade, also measure the height on the left, center, and right. Recording each result is more reliable than measuring at a single point, since openings can vary across the frame.
- Measure the frame depth as well as its width and height. For custom blinds, all three dimensions help determine whether the window can accommodate an inside mount. If the frame does not provide suitable depth, an outside mount places the treatment on the surrounding wall or frame. The mounting position also affects how the shade sits beside the glass and trim.
- Consider the treatment’s purpose before finalizing measurements. A roller shade intended for light control, for example, needs to suit its planned position and coverage. Professional measurement support can account for the window opening, frame depth, shade type, and mounting position together. Accurate dimensions also guide hardware placement and drilling points, reducing guesswork during installation.
Confirming removal of existing window treatments
Shades can be mounted on drywall, tile, or metal when the hardware suits the surface. After installation, check that each treatment is level, moves smoothly, and has secure mounting hardware.
- Confirm who will remove the existing treatments before installation day. Removal and disposal depend on the project scope, location, and homeowner’s proposal. If you’re responsible, take down the old shades or blinds before the installer arrives, unless you’ve agreed otherwise. Tell the installer beforehand if curtains, rods, or other coverings should remain in place.
- Clean the window and surrounding surfaces, then let them dry completely. Moisture or cleaning residue can affect the product, installation surface, or finished appearance. Wipe the frame after cleaning and wait until it is dry before installation begins. Keep fabric treatments and hardware away from damp areas.
- Prepare the room and window frame for the scheduled work. Move furniture away from the opening so the frame is accessible. Point out visible wiring or electrical controls near planned mounting positions before drilling begins. This helps the installer account for those conditions when positioning the hardware.
- Confirm the appointment and arrival window, and make sure the rooms are accessible. Installation typically takes 1-3 hours per window, with timing affected by the number of windows, product type, mounting conditions, and accessibility. A complex frame or obstructed window can change the pace, so keep the work area clear throughout the visit.
- Review the completed installation before the installer leaves. Raise and lower each shade, check its alignment, and look for secure brackets and smooth movement. For motorized treatments, test the controls and operating features. If a shade catches or sits unevenly, identify the window and describe the issue.
Shade and blind installation guides
Choose the mount and shade type before installation, since both affect placement and hardware. Follow the product instructions, then check alignment and operation.
-
Compare Inside and Outside Mounts
An inside mount sits within the window frame, leaving more trim visible. An outside mount attaches to the surrounding wall or frame and can suit an opening without enough depth. It can also cover more of the area around the window. Before marking drilling points, check that the planned position suits both the window and shade.
-
Follow the Installation Tools and Steps
Gather the product instructions, drill or screwdriver, level, steel measuring tape, step ladder, and pencil. Read the shade-specific instructions and confirm all parts are present before starting. Mark the bracket positions and check that they’re level, then fasten them with screws suited to the mounting surface. Fit the shade into the brackets and test its movement.
- Match the treatment to the room’s needs. Roller shades have a streamlined profile, while Roman shades create soft folds and cellular shades have a distinct construction. Consider the light control the room needs. A bedroom may call for stronger light control, while a living room with large windows may suit solar shades. The product and mount choices affect hardware placement and installation steps.
- Resolve fit issues before completing the installation. If an old bracket blocks the new position, remove it before mounting the replacement hardware. If the brackets are uneven, check them with a level before attaching the headrail. For motorized shades, test the motor and controls after fitting. For a chain-operated roller shade, install the supplied safety device and keep its loop secured and taut.
- Finish by operating each shade and checking its alignment. Raise and lower blinds carefully, watching for catching, uneven movement, or loose hardware. The treatment should move as intended and remain securely mounted. Keep children away from tools and installation materials while work is underway.
Professional installation compared with DIY
- Assess the window and treatment before choosing your approach. A small, accessible window with straightforward bracket placement may suit a confident DIY homeowner. Large treatments can be awkward to hold and position, especially at height. If a shade is heavy or the window is difficult to reach, professional installation avoids having to balance the product while mounting brackets.
- Consider the tools and skills each option requires. DIY installation calls for the product instructions, measuring tape, level, pencil, drill or screwdriver, and a stable step ladder. You’ll need to mark bracket positions accurately, choose hardware suited to the mounting surface, and keep the brackets aligned. A misplaced pilot hole can leave visible marks or mean choosing a new mounting position.
- Factor in the product and window count when planning time. Professional installers can complete an average roller shade installation in about 8 minutes per unit. DIY timing varies with experience, access, and how easily each shade fits its brackets. A motorized treatment or an unusual window position may add steps, including testing controls after mounting.
- Prepare carefully if you’re installing shades yourself. Clear furniture from the window, remove old brackets if they obstruct the new placement, and read the specific instructions before drilling. Large shades may need another person to support the headrail while you secure the brackets. Keep children and pets away from tools and materials during the work.
- Choose professional help when precise placement, high windows, multiple treatments, or motorized controls make the project more demanding. Installers work through mounting, alignment, and operation checks, while aiming to avoid unnecessary damage. For tailored window treatments and professional fitting, explore professional shade installation as an alternative to managing each bracket and adjustment yourself.
Luxe Drapery and Shades: Custom Drapery
Luxe Drapery and Shades helps bring window measurements and installation planning together with custom window treatments tailored to each room. If you’re weighing light control, privacy, and a refined finish, explore Custom Drapery, Roller Shades, Roman Shades, and Honeycomb / Cellular Shades. Each option creates a different effect, from the clean profile of a roller shade to the soft folds of a Roman shade. Thoughtful selection can help the treatment complement the window’s proportions and the room’s atmosphere. When precise fit, coordinated design, or installation feels like more than a DIY project, professional support can make the process more considered. Contact Luxe Drapery and Shades to discuss your window treatment project.
Shape the Next Step for Your Windows
Now that you know what to expect during a shade installation, use the planning process to make choices that feel right long after installation day. Consider how each room should feel at different times: a quiet bedroom, a softly lit living area, or a dining space framed with tailored fabric. Those priorities can guide your decisions about material, texture, privacy, and how each window relates to the wider interior.
Luxe Drapery and Shades offers Custom Drapery, Roller Shades, and Roman Shades, each providing a different way to shape light and finish a room. If you’re ready to move from measurements and ideas to a considered window treatment plan, Luxe Drapery and Shades can help you explore options for your home. Coordinating color and proportion helps each treatment complement the architecture rather than compete with it.
Contact Luxe Drapery and Shades to discuss your window treatment project. A thoughtful choice can make everyday comfort feel beautifully at home.
Frequently Asked Questions
Does Professional Installation Damage the Walls?
Professional installation can involve drilling mounting points, but installers aim to avoid unnecessary wall damage. Bracket placement depends on whether the shade mounts inside the frame or outside it, as well as the available surface. In a Los Angeles home, point out any wiring near the planned hardware before work begins so the installer can plan an appropriate layout.
What If Your Windows Are Large or Unusual?
Large or unusual windows need a mounting plan suited to their shape, access, and treatment width. Skylights, angled windows, and specialty mounts can add 5-10 minutes per shade. For roller shades wider than 60 inches, a center support bracket helps reduce sagging and roller-tube flex. A large shade can also be awkward to hold while positioning, so support and placement matter.
What to Expect During the Installation Process?
Expect the installer to review the product instructions, position the brackets, mount the treatment, and test its movement. Drilling, light noise, ladders, tools, packaging, and movement through the home may all be part of the visit. Knowing what to expect during a shade installation also means allowing time for an operating check, especially for treatments with motorized controls.
What happens during a window shade installation appointment?
During the appointment, the installer fits each treatment to its opening and checks how it operates. For motorized shades, test your preferred control method, such as touch or voice commands, and confirm that the shade responds as intended. Keep the room accessible until tools and packaging are cleared, and mention any uneven movement before the visit ends.
How should I prepare my home for shade installation?
Clear the route to each window, including the path from the entrance through the room. Move delicate items away from nearby surfaces, and keep pets and children clear of active work areas. If a room has several treatments, leave access to each opening rather than shifting furniture between installations. Dry windows and surrounding surfaces also help protect the finished appearance.
How long does it take to install window shades?
Professional installation typically takes 1-3 hours per window. The overall visit depends on the number of windows, shade type, mounting conditions, and access to each opening. One accessible window differs from a room with several treatments or difficult access, which can extend the work. Most residential custom-shade installations are completed in a single day.