

Measuring for corner window treatments doesn’t always mean measuring frame to frame or wall to wall. For inside-mount blinds, measure within the window frame; for an outside mount, measure the area you want the treatment to cover, including the frame and trim. Measure rods and tracks along their mounting surface, paying close attention to how the two sides meet at the corner.
It’s easy to assume adjoining windows need matching measurements, especially when their frames look alike. But corner openings can differ, and the right measurements depend on the treatment, mount type, and coverage you want.
This guide explains how to choose between frame-to-frame and wall-to-wall measurements, compare widths at the top, middle, and bottom, and account for corner clearance. You’ll also learn how to measure rods, tracks, and cellular shades, where a small adjustment can help prevent treatments from overlapping or leaving a gap.
Key Takeaways
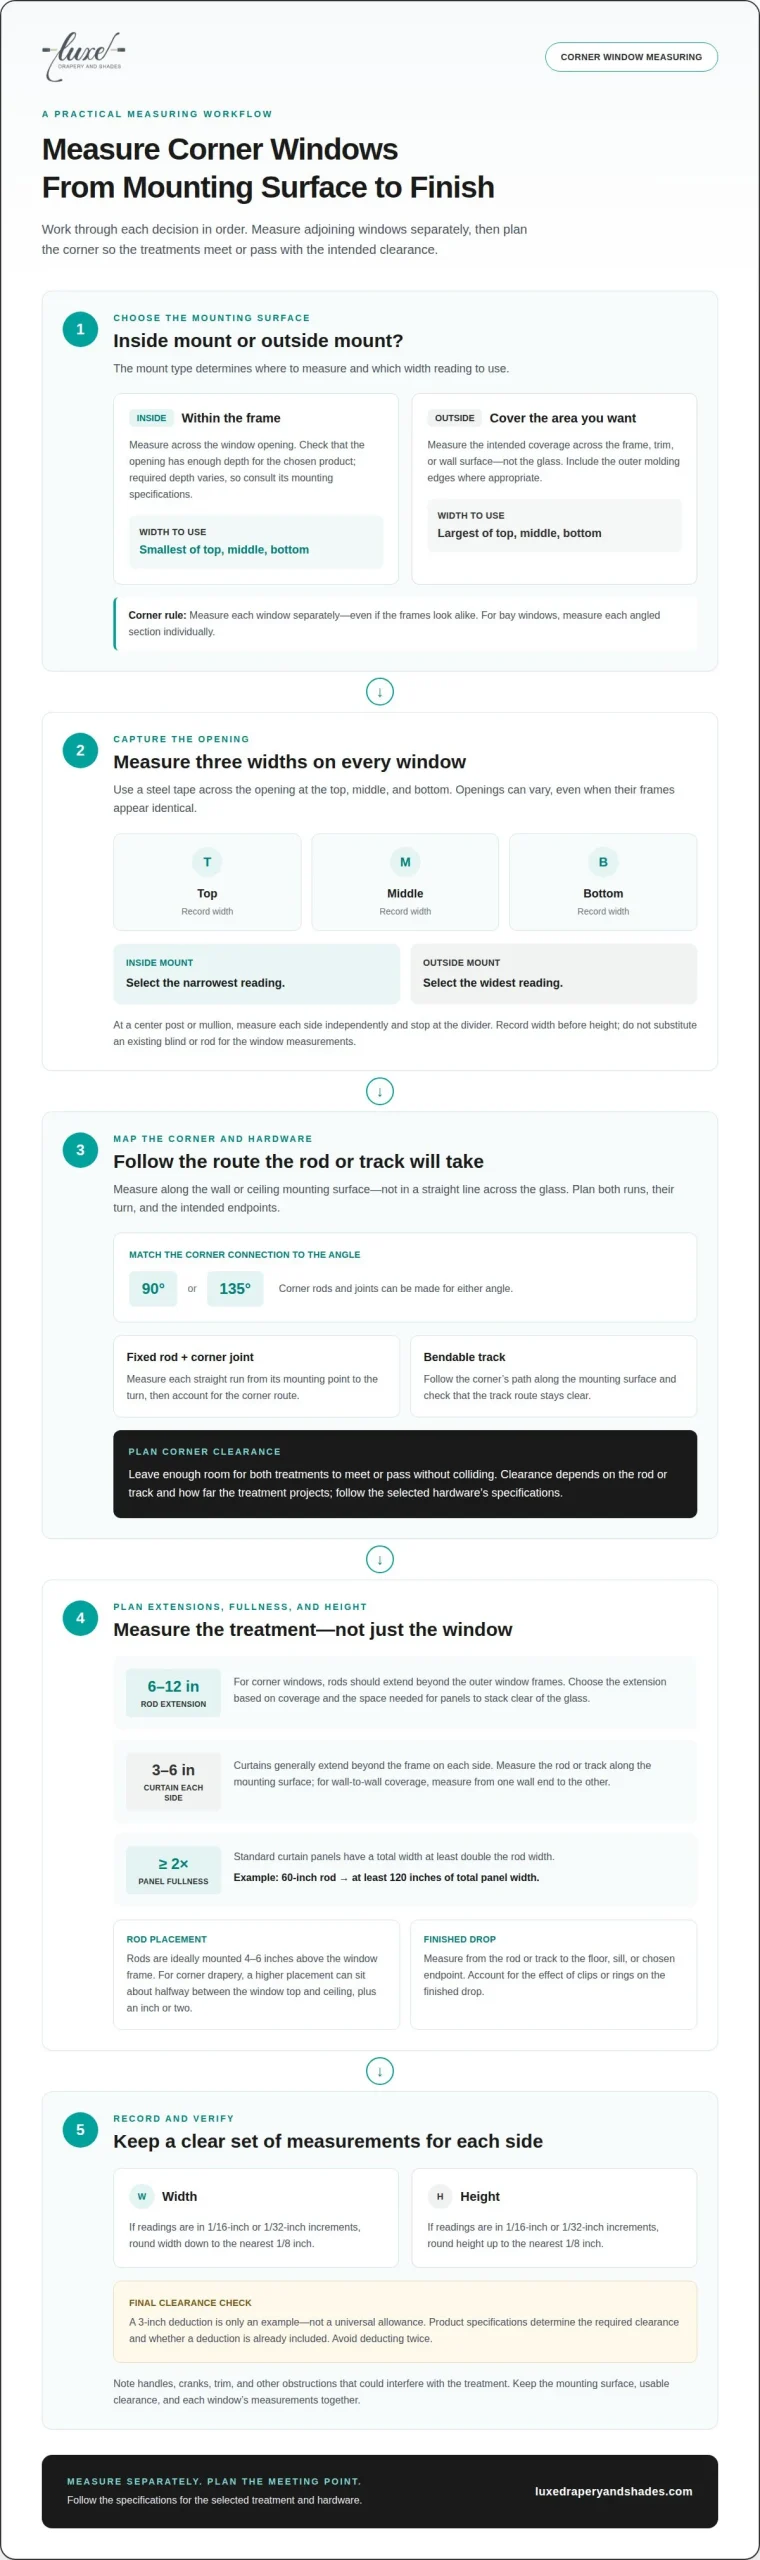
- Choose the mounting surface first: inside mounts use the window opening, while outside mounts are measured for the coverage you want.
- Measure each window at the top, middle, and bottom; use the smallest width for an inside mount and the largest for an outside mount.
- Plan rods and tracks around the corner’s angle and the treatment’s projection so the two sides meet with the intended clearance.
- For cellular shades, distinguish the bypass side from the butt side and account for the product’s corner clearance without deducting twice.
How Do You Measure Blinds for Corner Windows?
Accurate measuring for corner window treatments starts with deciding whether each blind will sit inside the frame or cover the opening from outside. Measure both sides separately and account for where the treatments meet.
-
Measure the Window Width
Measure each window’s width at the top, middle, and bottom. For an inside mount, measure across the opening and use the smallest reading. For an outside mount, measure the coverage area from one outer molding edge to the other and use the largest reading. Record width before height, and don’t assume adjoining windows match.
Bay windows have multiple angled sections, so measure each section individually. At a corner, two windows meet at a 90-degree angle, and measurements must account for their shared meeting point. Manufacturer requirements can vary by product and mount type, so follow the specifications for the selected blind.
-
Check Inside-Mount Depth
Measure the depth of the window opening from the front edge of the frame toward the glass. Inside-mount treatments sit within the frame, so the opening needs enough depth for the chosen product. Required depth varies by product; check its mounting specifications before choosing this installation type.
If the opening lacks the required depth, an outside mount can cover more of the window. Measure the intended coverage across the frame, trim, or wall surface, rather than using the glass as the boundary. For custom blinds, record each window separately, even when the frames appear identical.
-
Account for Corners and Obstructions
Measure each side independently, stopping at a center post or mullion that divides the openings. Include trim in outside-mount coverage, then note handles, cranks, or other obstructions that could interfere with the blind. Measuring for corner window treatments means recording the mounting surface and usable clearance, not just the glass dimensions.
Avoid measuring an existing blind instead of the window, assuming two openings match, or overlooking corner clearance. These mistakes can leave a gap or make treatments interfere where they meet. A 3-inch deduction is only an example, not a universal allowance; product specifications determine clearance and whether a deduction is already included.
Taking width measurements at the top, middle, and bottom
Leave enough room at the corner for both treatments to meet or pass without colliding. The required clearance depends on the rod or track and how far the treatment projects, so follow the selected hardware’s specifications.
- Measure each window opening across the top, middle, and bottom with a steel tape. Openings can vary even when frames look alike, so record all three readings for each window. For a new curtain rod, measure the window width in these places rather than relying on an existing rod, which may be too narrow.
- Plan the rod extensions beyond the outer window frames. For corner windows, rods should extend 6 to 12 inches beyond the outer frames; curtains generally use 3 to 6 inches beyond the frame on each side. Choose the extension based on the coverage and space needed for panels to stack clear of the glass.
- Measure the rod or track along its mounting surface, not across the glass. For wall-to-wall coverage, measure from one wall end to the other. Add the width needed for fullness: standard curtain panels have a total width at least double the rod width. For example, a 60-inch rod calls for at least 120 inches of total panel width.
- Record curtain height from the rod or track to the floor, sill, or chosen endpoint. Where you stop the measurement depends on the treatment. If the curtain uses clips or rings, account for how the attachment hardware affects the finished drop.
- Write down width before height, then round carefully. With readings in 1/16-inch or 1/32-inch increments, round width down to the nearest 1/8 inch and height up to the nearest 1/8 inch. For a coordinated rod or track plan, consider drapery hardware alongside your measurements.
Choosing rods, joints, and bendable tracks for corner angles
Choose the treatment and hardware before finalizing measurements. For wraparound or bendable rods, measure along the mounting surface and follow the corner’s path, not a straight line across the glass.
- Identify the corner angle and how the rod should turn. Corner rods and joints can be made for 90-degree or 135-degree corners. For an inside corner, choose hardware that fits into the corner; for an outside corner, choose a rod that wraps around it. The correct connection keeps both curtain runs aligned.
- Decide between a fixed rod with a corner joint and a bendable track. Measure each straight run from its mounting point to the turn, then account for the route around the corner and the intended endpoints. Measure from the mounting surface rather than the glass, since the hardware follows the wall or ceiling line.
- Decide what you want the treatment to do before choosing its design. Curtains can block light, provide privacy, or add a decorative layer, and that choice affects fabric, fullness, and how the panels move around the corner. If the curtains need to draw across both windows, make sure the track path is clear and uninterrupted.
- Mark the intended curtain height before measuring the drop. Rods are ideally mounted 4 to 6 inches above the window frame; for corner drapery, a higher placement can sit about halfway between the window top and ceiling, plus an inch or two. Measure from the planned rod or track to the floor, sill, or desired endpoint.
- Plan the brackets and corner hardware together before installation. Check that the turn, brackets, and nearby trim leave room for curtains to move without catching. A clear drawing of each run and its endpoint makes measurements easier to use and helps the finished installation follow the window’s shape.
Cellular shade corner measurements
- Identify which shade will pass the corner and which will stop beside it. The bypass-side shade extends closest to or across the meeting point; the butt-side shade ends short to allow clearance. Label each window before measuring so you don’t reverse the two widths.
- Use a steel tape measure at the mounting surface, not across the glass. Measure each window separately, even if the openings appear alike, because corner windows can differ by several centimeters or inches. For an inside mount, measure the width and height within the frame; for an outside mount, measure the intended coverage, including the frame or trim.
- Measure the bypass side from the inside corner to the outside edge of the desired coverage. Then measure the butt side from its outside edge to the inside corner, recording the full available width before accounting for corner clearance. These distinct reference points clarify how the two shades will meet.
- Apply the clearance required by the selected cellular shade to the butt-side measurement. For example, if the bypass-side measurement is 72 inches and the full butt-side measurement is 60 inches, a 3-inch clearance gives an approximate finished butt-side width of 57 inches. That 3-inch deduction is an example, not a universal rule; a shallow cellular shade, a 2-inch faux wood blind, or a cassette can need different clearance.
- Check how the manufacturer handles deductions before finalizing the order. Some specifications may already account for corner clearance, so subtracting it again can make the shade too narrow. Compare the product instructions with your recorded measurements, including any cassette or fascia, then keep the coverage and meeting point in view. For a tailored fit, explore custom honeycomb cellular shades.
Luxe Drapery and Shades
Luxe Drapery and Shades helps turn corner-window measurements into a cohesive treatment plan, balancing coverage, privacy, and the way adjoining treatments meet. The team can guide you when corner clearance, mount type, or varied window shapes make planning less straightforward.
Custom Drapery, Roller Shades, Roman Shades, and Honeycomb / Cellular Shades offer different ways to shape light and finish a room. Choose based on your preferred look, how you want the treatments to function, and the measurements recorded for each window. A considered selection can make the finished space feel cohesive rather than pieced together.
Contact Luxe Drapery and Shades for help matching your corner-window measurements with a suitable treatment.
Bring Your Corner Windows Into Focus
A considered approach to measuring for corner window treatments sets the stage for a room that feels intentional, not simply covered. Next, connect those measurements to how you want the space to look and function, from a softer draped finish to a clean, tailored shade. Consider how adjoining windows relate so each treatment contributes to a unified composition.
Luxe Drapery and Shades can help turn your ideas into a custom window-treatment plan. Explore Custom Drapery, Roller Shades, or Roman Shades to find an option suited to your windows and design preferences. The goal is a considered balance of coverage, light, and visual continuity that complements the room.
Share your corner-window project with Luxe Drapery and Shades and start a conversation about your window treatments. With a clear plan, your corner windows can become a graceful part of the room’s overall design.
Frequently Asked Questions
Frame to Frame or Wall to Wall?
Measure frame to frame when a treatment is intended to cover one window opening; measure wall to wall when you want continuous track or curtain coverage across the space. For example, measure a blind fitted to each opening separately, while a long drapery track may span both windows and the corner. Choose the coverage first, then measure from its actual mounting surface.
Need Help Measuring?
Yes. Luxe Drapery and Shades can help with treatment selection, accurate measurements, a comprehensive quote, and a project timeline. This support is useful when the corner’s shape, mounting surface, or treatment choice makes dimensions difficult to coordinate. Los Angeles homeowners can discuss their intended coverage and room design with the team while planning a tailored window-treatment project.
Wrap Around or Fit Into?
For an inside corner, choose a rod or joint designed to fit into the corner; for an outside corner, use hardware that wraps around it. The right choice depends on the corner’s shape and the route you want the curtains to follow. Before installation, map where each run starts, turns, and ends to ensure the hardware path suits the room.
How do you measure a corner window for curtains or blinds?
Measure each window or curtain run as a separate section, and note where the treatments meet. For curtains, record the track or rod route and the desired finished drop. For blinds, record each opening’s dimensions and mount type. A center post, deep trim, or nearby handle can affect how a treatment fits and operates, so include these details in your plan.
How do you measure inside-mount and outside-mount corner window treatments?
For an inside mount, measure within the frame and account for the opening’s depth. For an outside mount, measure the area you want covered, including relevant trim or molding. At a corner, plan the coverage for each side independently, then consider how the treatments meet. Use the product’s mounting requirements to determine which dimensions apply.
What measurements are needed for custom corner blinds or shades?
Record each opening’s width and height, the intended mount, and the available depth for an inside installation. For adjoining corner windows, identify which shade passes the corner and which ends beside it, then note the required clearance and any deductions already built into the product. Label each measurement by window and side to keep the order details clear.